We lost our relatively new batteries in October 2019 when they mysteriously lost their charge. They were newly installed in June 2018 and we were surprised and dismayed to have to buy new ones so soon.
Not wanting this to happen again, Baz did lots of research and discovered that battery charge can be affected by unequal lengths of cable and also depends on how they’re connected.

There are various methods of connecting batteries as you can see here, and each one gives a surprisingly (to the non-electrician like me) different result.
Method 1 discharges and charges the batteries unevenly
Method 2 discharges and charges the batteries somewhat more evenly
Methods 3 and 4 allow for a balanced discharge and charge across all the batteries.
Baz chose method 3 as our new connection method and bought some new, equal length pieces of connecting cable from Limni. He couldn’t get red cabling for the positive connections, so just went with all black.

He also purchased 2 bus bars and after some clever (in my opinion) work, connected them all up correctly.

It will be interesting to see how the charge holds in each one over time.
We’re also going to purchase two desulfators, which basically vibrate the contents of the batteries and prevent sulphur building up on the plates, which ultimately makes the batteries more effective and extends their lifespan.
Fun with UV Resin
You probably know by now that I make sea jewellery from beach finds and sterling silver wire. Well recently, I purchased some UV resin and I’ve been making jewellery with that too. It’s a great process and really adds another dimension to my work, with some very pretty new pieces.
I’ve chosen UV resin over epoxy resin. Why? Well, epoxy resin can take up to 48 hours to dry. Imagine we’re sailing. I’ve just made some jewellery. What’s going to happen to the unset resin in the moulds when we heel?
UV resin on the other hand sets in UV light and that can be sunlight or a UV nail lamp, or torch. I have both. The only downside to the UV resin is that it has to be dried in layers otherwise it can buckle quite badly. But apart from that, and as I’ve never worked with epoxy resin, it’s just fine for me!
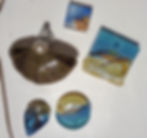
Here are some pieces I’ve been working on.

In the video I run through a few stages of the process so you can see how resin jewellery is made up, and what it involves to make a piece.
I’ve just experimented with embedding photocopies of a painting I did of a sea turtle when I was in Australia. I sealed the paper/ink with mod podge glue and then placed it into a mould where I added layers of resin. Initially, I added acrylic paints to the resin and painted that over, so you can’t see the paper’s edges. Then I build up the layers with clear resin, and added a wave effect on the bottom of the piece, colouring it slightly with fine strokes of resin coloured with resin ink.
I’m stoked with the result and will definitely be making more of them. They’ll make lovely pendants.
Here are a few photos. What do you reckon?
Cutlass Bearing and Keel
Last week we showed how the cutlass bearing didn’t fit, being 0.05mm (0.002 inch) too large. This happened as a result of assuming it would be metric sizing as our boat is French built and Europe uses the metric system. Well that proved wrong! So we’re waiting for a replacement bearing, which has arrived in Athens but is waiting to be delivered to us in Limni. Let’s hope it’s not too long before that arrives as the engine rebuild is on hold until we can replace the prop shaft.
Meanwhile, Baz noticed that there were parts of the antifoul on the keel that were cracked and lifting from the surface and we spent one day getting rid of as much of the flaky parts as we could. I used a sharp knife and Baz followed me with the angle grinder.
As the job was bigger than Baz thought, he bought a couple of angle grinder flap pads from the local hardware store in Limni the following day. That got the antifoul paint and epoxy primer off very quickly. Of course that meant I’d wasted the previous day picking off the paint when I could have been making jewellery, but oh well, that’s what happens sometimes.
Baz did a great job getting rid of all excess loose antifoul and now we’re waiting for it to stop raining so we can sand off the thin oxidation layer that builds up after 24 hours of the iron being exposed, wipe off the dust, and quickly slap on rust treatment before putting on primer, filler and finally the antifoul paint.
Time is a movin’ on
And restrictions will soon be lifted, allowing us to sail around Greece. There’s no word on when borders will open again – and we need Greek and Turkish borders to open before we can get to Kaş, but it will be wonderful to splash A B Sea back in the sea again. Once the Greek islands open up, we’ll at least be able to sail south and east, making our way slowly to Turkey, so once borders open, we’ll be able to sail on over!
In the meantime, we still have boat jobs to do. We can’t tick the engine off the list due to the cutlass bearing, but we can get on with the antifouling.
Have you had restrictions lifted where you are? Or are you still locked down with little freedom? We’d love to hear from you.
If you’d like to see the video that accompanies this blog just click here.